Difference between revisions of "Zimbra: Thunderbird Calendar"
(clarify, link) |
|||
| (15 intermediate revisions by 2 users not shown) | |||
| Line 1: | Line 1: | ||
Zimbra | [[Zimbra]] is NCF's webmail system. | ||
Zimbra's calendar and contacts follow the CalDAV and CardDAV standards. For contacts, see [[Zimbra: Thunderbird Contacts]]. | |||
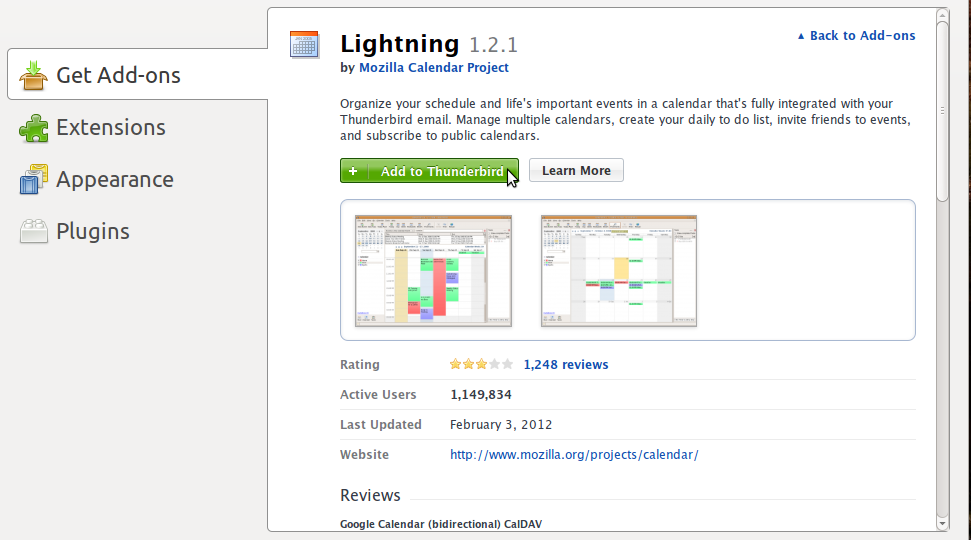
To install the Zimbra calendar in older versions of the [https://en.wikipedia.org/wiki/Mozilla_Thunderbird Mozilla Thunderbird] email client , you need to install the "Lightning" calendar addon. Go to Tools -> Addons, and search for "Lightning". For later versions it is already included with Thunderbird. | |||
http://www.ncf.ca/ncf/support/zimbra/zimbra_cal0.jpg | |||
Once the Lightning calendar component is installed, the steps to add your Zimbra calendar are as follows: | |||
1. Click on <tt>File</tt> -> <tt>New</tt> -> <tt>Calendar</tt> | |||
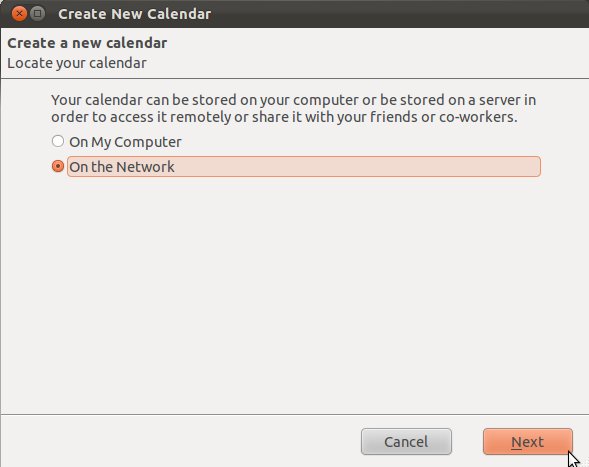
2. Select <tt>On the Network</tt> | |||
3. Click <tt>Next</tt> | |||
http://www.ncf.ca/ncf/support/zimbra/zimbra_cal1.jpg | http://www.ncf.ca/ncf/support/zimbra/zimbra_cal1.jpg | ||
4. Select <tt>CalDAV</tt> | |||
5. Enter the following into the Location: <tt>https://mail.ncf.ca/dav/ACCOUNT_ID@ncf.ca/CALENDAR_NAME</tt> | |||
:Enter your NCF accountID where it says ACCOUNT_ID, and the Zimbra calendar you wish to add where it says CALENDAR_NAME. | |||
:eg., in my case, to add the default Zimbra calendar, which is named simply "Calendar", I would enter: | |||
:<tt><nowiki>https://mail.ncf.ca/dav/al178@ncf.ca/Calendar</nowiki></tt> | |||
6. Check <tt>Cache</tt> - so your calendar contents will be accessible even if you're offline | |||
7. Click <tt>Next</tt> | |||
http://www.ncf.ca/ncf/support/zimbra/zimbra_cal2.jpg | http://www.ncf.ca/ncf/support/zimbra/zimbra_cal2.jpg | ||
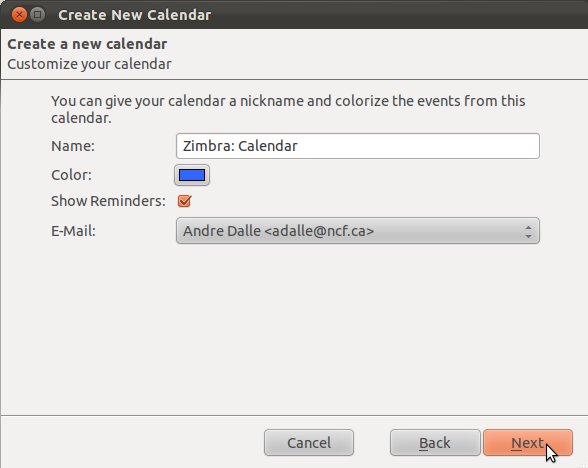
8. Give it a name, eg. <tt>Zimbra: Calendar</tt>, and choose a color - I like blue! | |||
9. If you have more than one email account setup, you'll also want to tell it which one to associate with that calendar | |||
10. Click <tt>Next</tt> | |||
http://www.ncf.ca/ncf/support/zimbra/zimbra_cal3.jpg | http://www.ncf.ca/ncf/support/zimbra/zimbra_cal3.jpg | ||
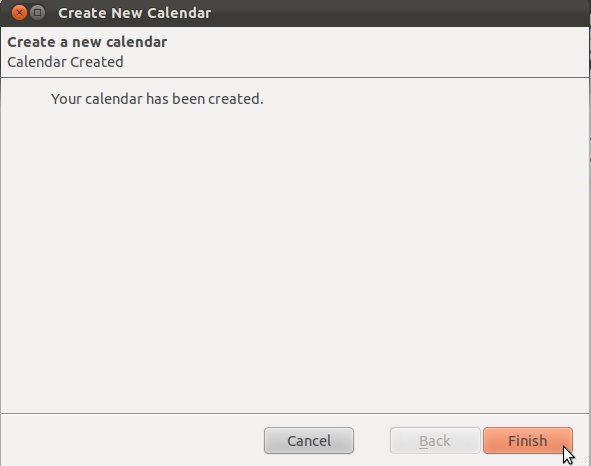
11. Click <tt>Finish</tt> | |||
http://www.ncf.ca/ncf/support/zimbra/zimbra_cal4.jpg | http://www.ncf.ca/ncf/support/zimbra/zimbra_cal4.jpg | ||
[[Category: | ==See also== | ||
*[[Zimbra: Thunderbird Contacts]] | |||
[[Category: Zimbra]] | |||
Revision as of 08:56, 25 March 2017
Zimbra is NCF's webmail system.
Zimbra's calendar and contacts follow the CalDAV and CardDAV standards. For contacts, see Zimbra: Thunderbird Contacts.
To install the Zimbra calendar in older versions of the Mozilla Thunderbird email client , you need to install the "Lightning" calendar addon. Go to Tools -> Addons, and search for "Lightning". For later versions it is already included with Thunderbird.
Once the Lightning calendar component is installed, the steps to add your Zimbra calendar are as follows:
1. Click on File -> New -> Calendar
2. Select On the Network
3. Click Next
4. Select CalDAV
5. Enter the following into the Location: https://mail.ncf.ca/dav/ACCOUNT_ID@ncf.ca/CALENDAR_NAME
- Enter your NCF accountID where it says ACCOUNT_ID, and the Zimbra calendar you wish to add where it says CALENDAR_NAME.
- eg., in my case, to add the default Zimbra calendar, which is named simply "Calendar", I would enter:
- https://mail.ncf.ca/dav/al178@ncf.ca/Calendar
6. Check Cache - so your calendar contents will be accessible even if you're offline
7. Click Next

8. Give it a name, eg. Zimbra: Calendar, and choose a color - I like blue!
9. If you have more than one email account setup, you'll also want to tell it which one to associate with that calendar
10. Click Next
11. Click Finish